Houston Sprinkler Systems Upgrade

Upgrade Existing Sprinkler Systems
Texas Licensed Irrigator #4846
- Replace your old Controller "clock" with an updated more current model.
- These new Controllers are becoming more "user friendly" and are easier to program, have more than one program, water budgeting features, etc...
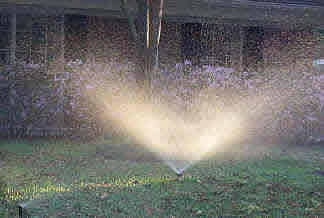
- Replace worn-out or inefficient pop-up sprays and rotaries with "Rainbird" pop-ups and "Hunter" rotaries.
- Put new nozzles on existing spray heads. Adjustable or fixed nozzles can be installed to accommodate changing plant material or bed contour changes.
- Change short 2" or 4" sprays to 6" or 12" pop-ups to accommodate plant growth (2" sprays should not be used).
- Add Spray Heads to a zone to give more coverage and better water distribution for a particular stressed area (only if there is available pressure on that particular zone).
- Replace cheaper "hardware grade" Pressure Vacuum Breakers (PVB) with brass commercial/testable PVB. You need to test these safety devices annually to assure that they are functioning properly. Many cheaper versions are light plastic and are non-testable. These devices are often installed improperly. Check to be sure that they are at least 12" above the highest head (pop-up spray or riser) in your yard.
- Evaluate the water distribution and coverage of your existing sprinkler system. If there are dry spots in your yard more pop-up sprays, rotaries, valves or zones can be installed to allow for a more uniform, effective watering system.
- Separate an existing zone (add a valve) that may be spraying a flower bed and turf grass at the same time or a sunny and shady area at the same time or divide an existing zone that has low pressure (too many heads on one valve) into 2 zones.
- Change out old manual valves with electronic automatic valves. When this is the situation you will usually need a controller and pressure vacuum breaker installed at the same time.
- Locate and repair valves in your yard. (It is a good idea to know where your valves are in the yard, in the event of a malfunction or solenoid replacement. We use an electronic valve locator device to locate these valves.)
- Add a main line cut-off valve (usually located by your water meter). This allows you to cut off the water supply to your sprinkler system for repairs or to prepare the system for freezing weather.
- Add a Master Valve - a valve that is mounted just before the Pressure Vacuum Breaker. Adding a Master Valve holds the pressure off of all the other yard valves when the system is not in use. This extends the life of the other valves by not being under constant pressure. The Master Valve is wired to the controller.
- This does not use up available valve slots. It has a dedicated location. When a Master Valve is wired to your system, the controller sends a signal to the master valve circuit first, then to the yard valve second. This process allows the master valve to release water (or pressurize) the main line for the programmed amount of time.
- The Master Valve also acts as a safety valve in the event one of the yard valves fails to close. (When the program is complete, the master valve cuts off the supply of water until the next programmed start time.)
- Add a Rain Sensor - this device interrupts (or stops) normal valve operation when activated by rain. When the rain sensor dries out, normal valve operation is restored. Great device to have when you are out of town or when it starts to rain at 3:00am and your system is programmed to turn on at 5:00am. You do not have to remember to turn the system off!
- Common Contractor Shortcuts
- Helpful Tips When Selecting A Contractor
- Frequently Asked Questions
- Points To Remember
- Terms And Definitions
- Watering Schedule
- Winterizing Sprinkler System
- Drip Irrigation
- Sprinkler System Options
- Pressure Vacuum Breaker Inspections
- Sprinkler System Basic Troubleshooting
- Upgrade Existing Sprinkler System